Setting up the Microsoft Tools
This guide will walk you through authenticating the Microsoft tools by using Airia's OAuth 2.0 connector.
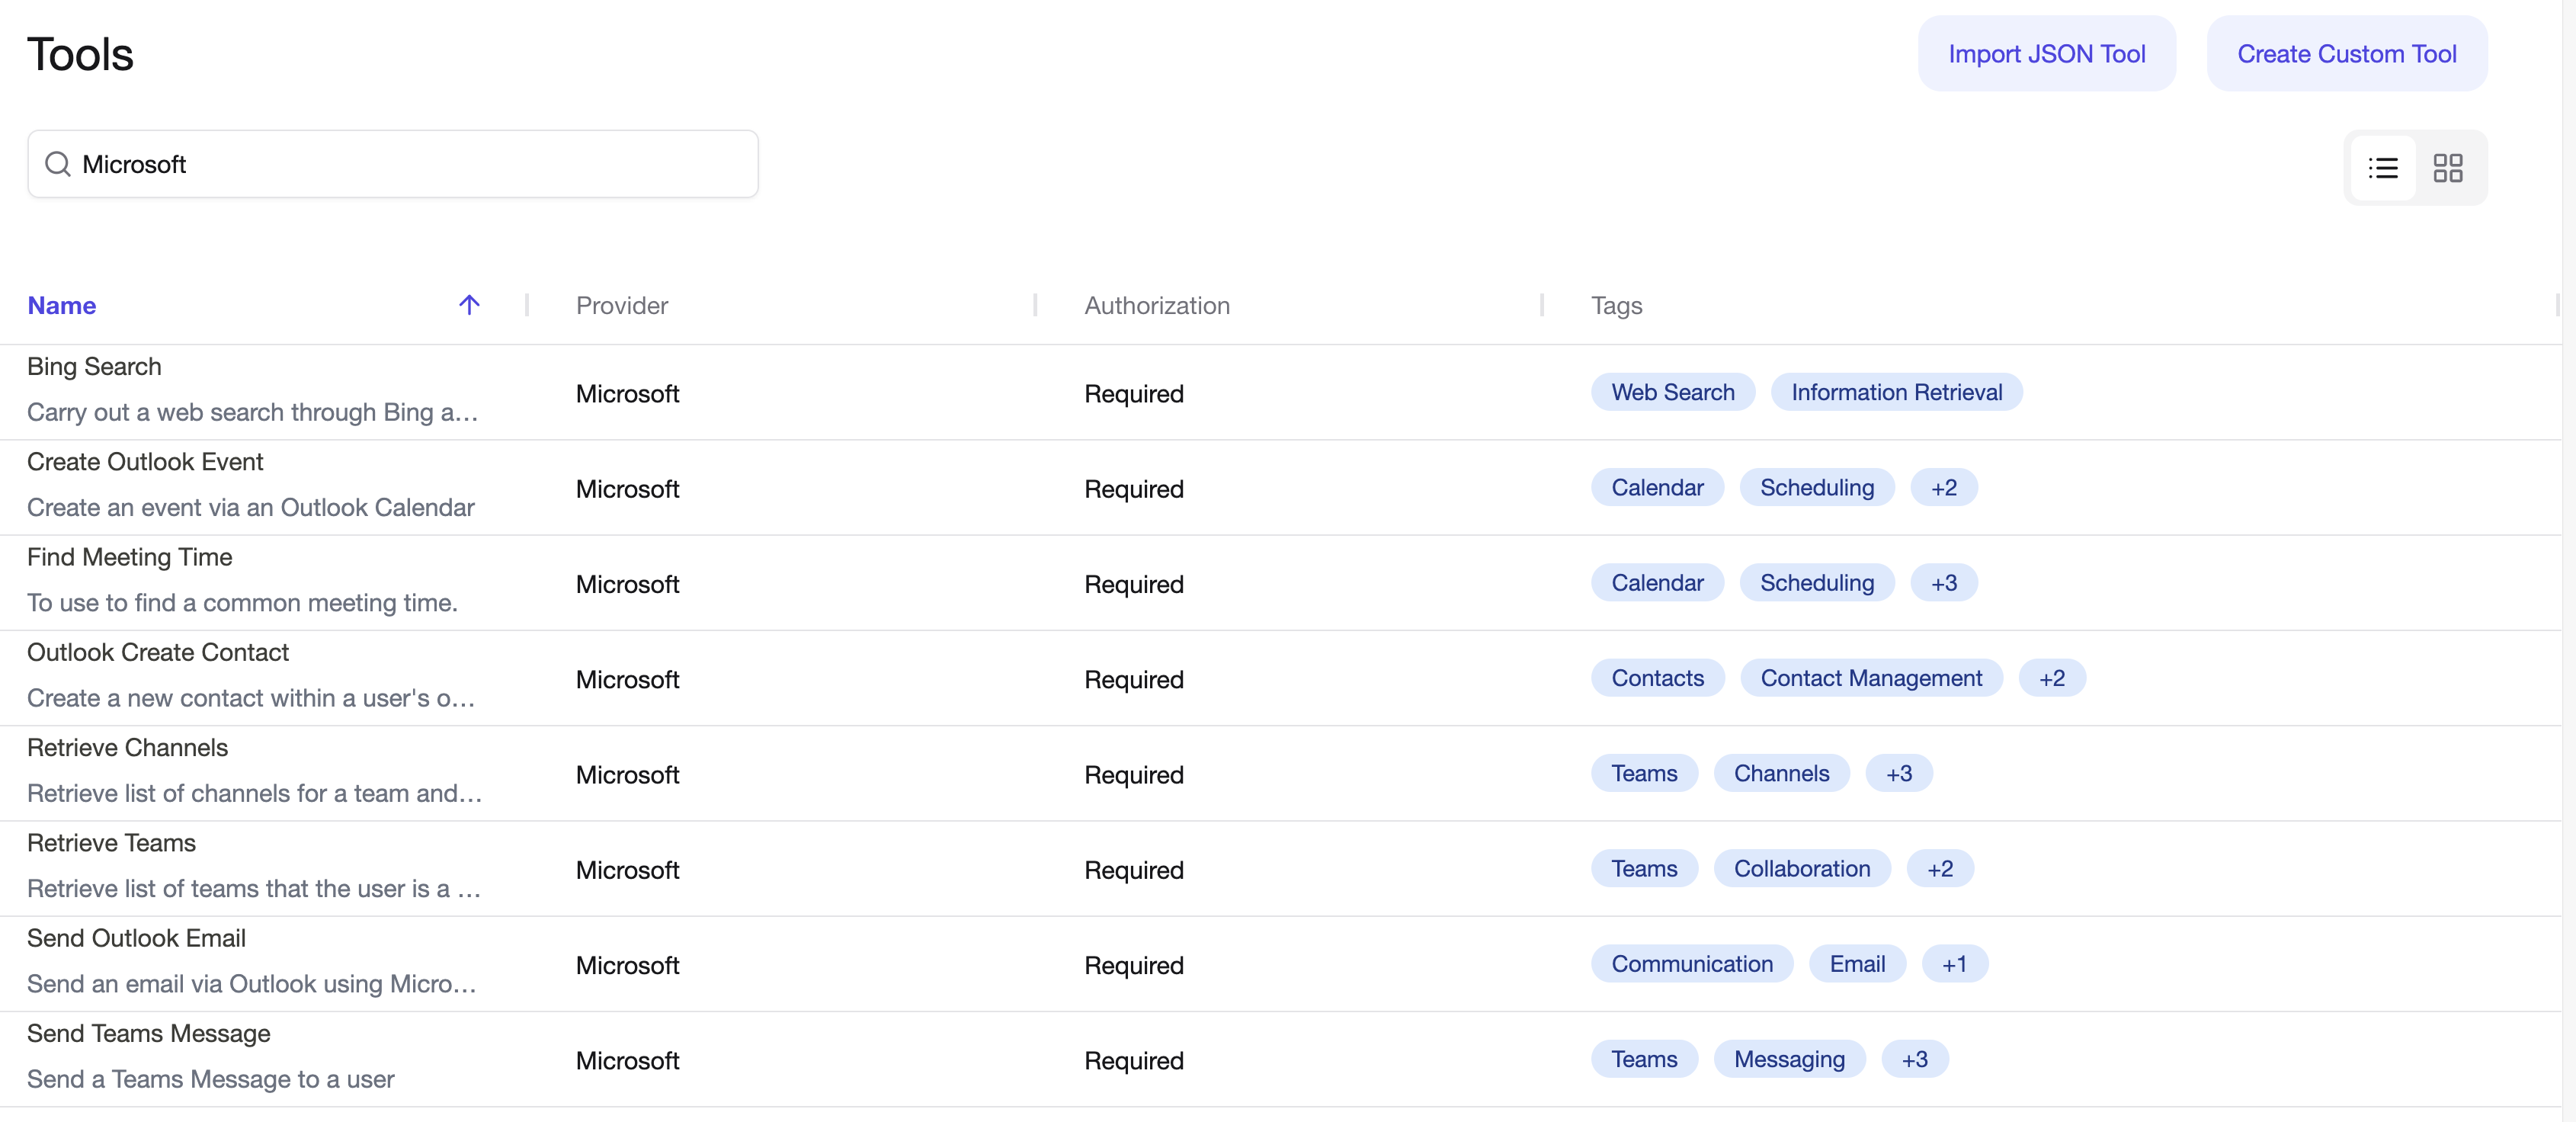
Currently, the following tools are supported for Microsoft-based access:
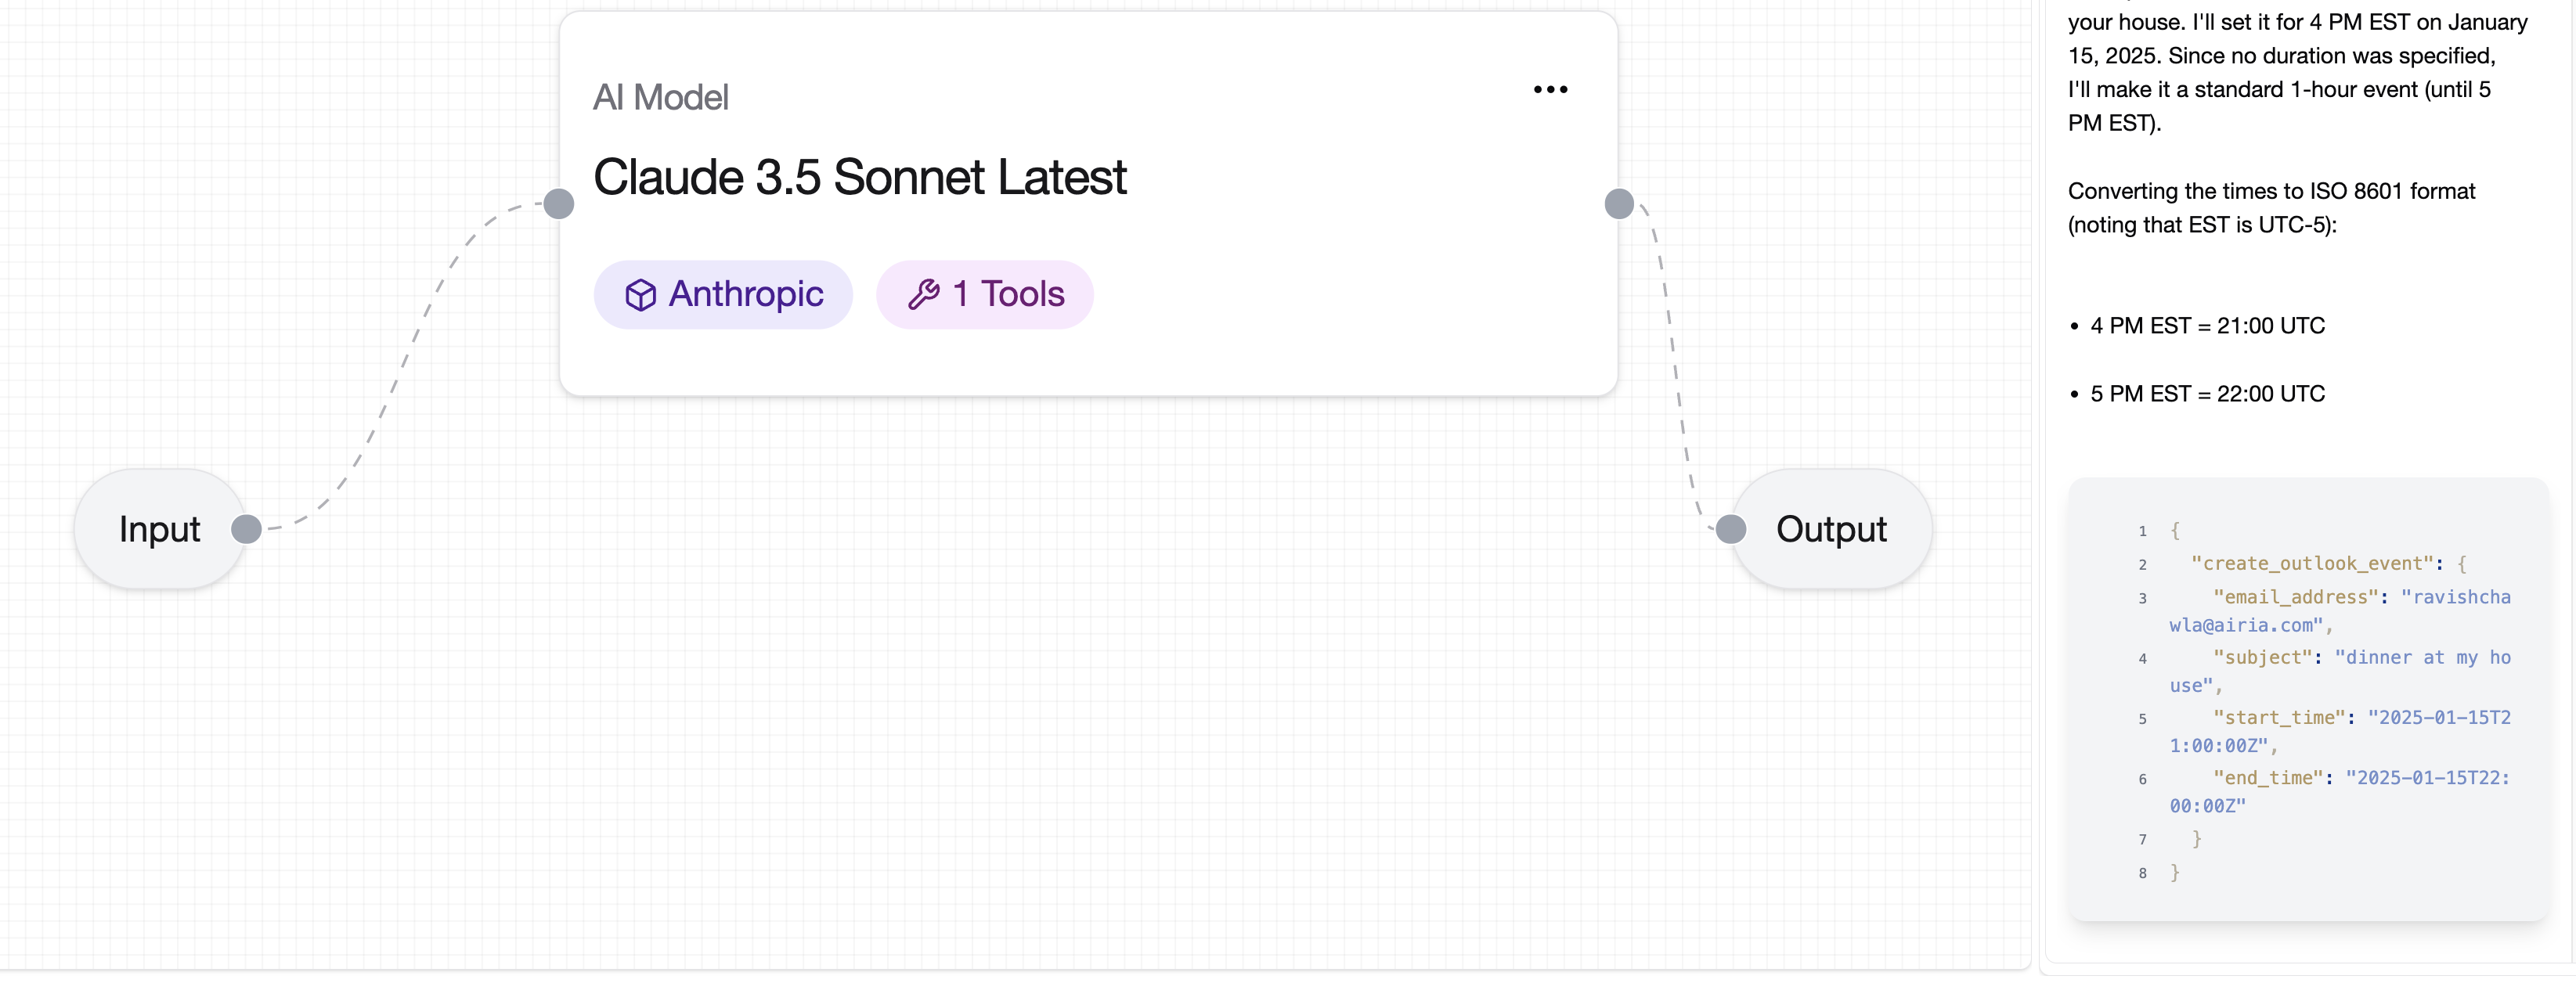
- Create Outlook Events
- Find Meeting Times
- Create Outlook Contacts
- Send an email via Outlook
- Send a message via Teams
Adding a Microsoft Tool
-
Add a Tool Navigate to the library and select the corresponding Microsoft-based Tool from the above list.
-
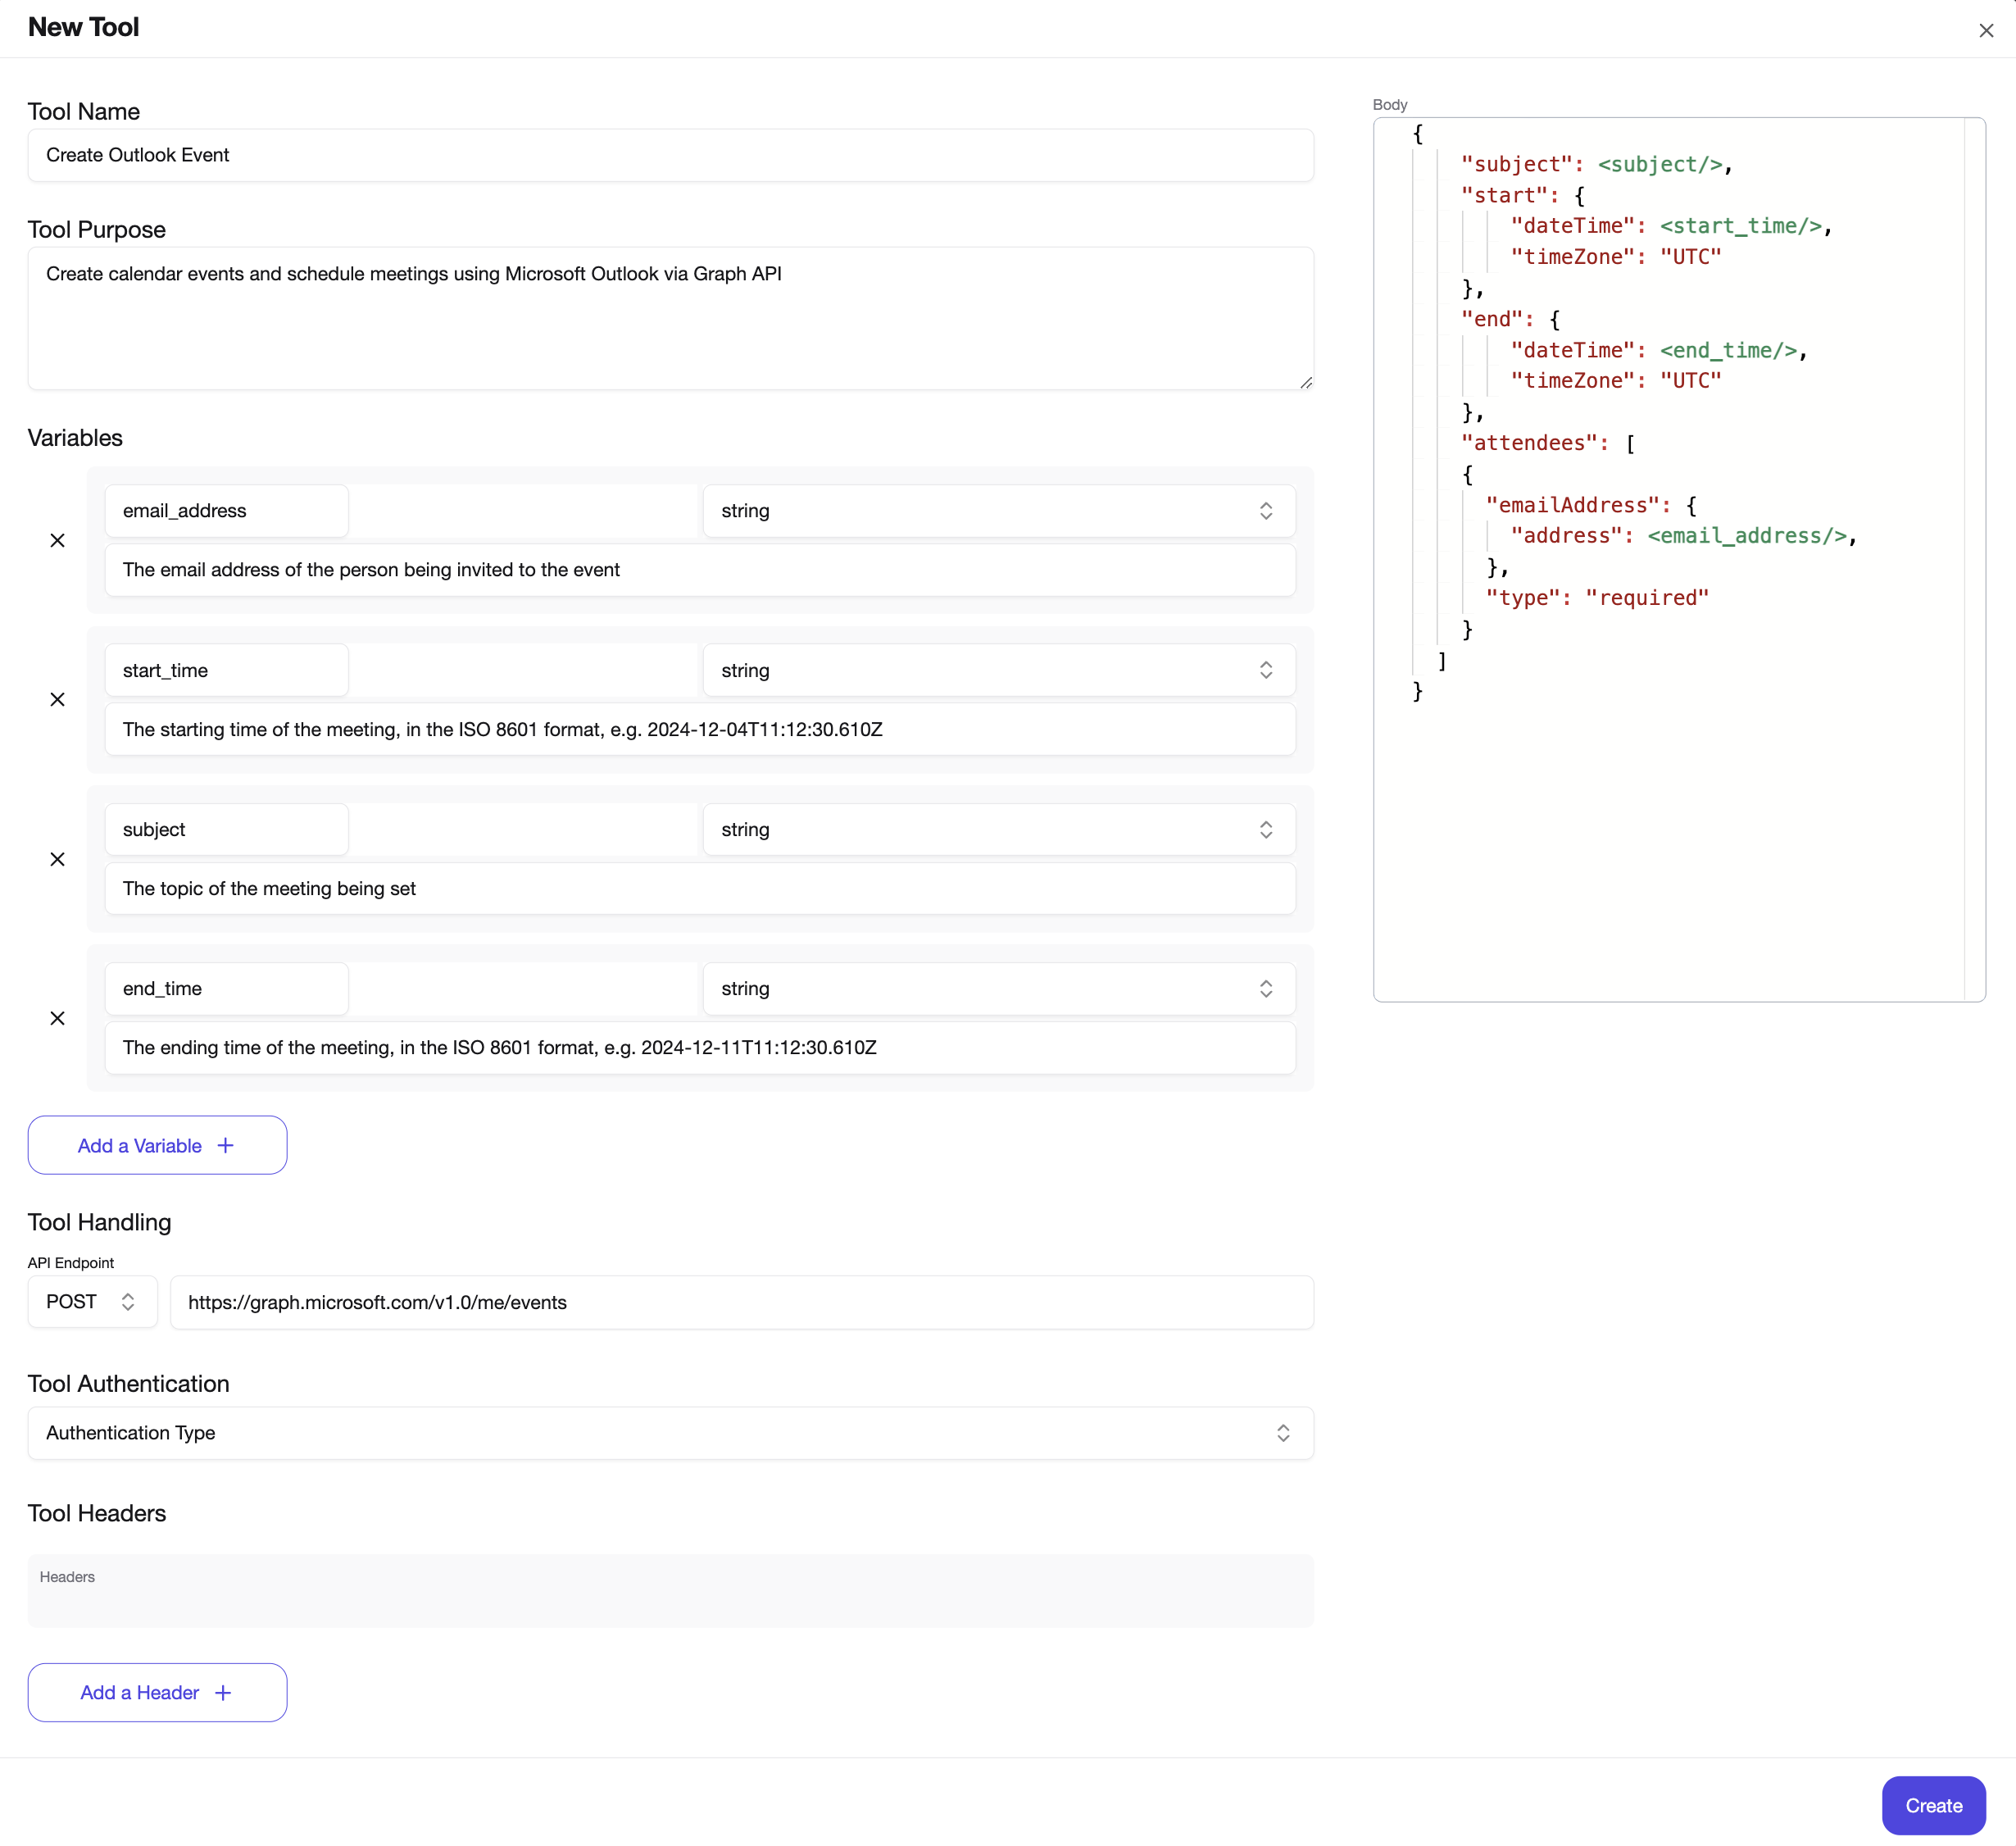
Validate the information on the Tool page Microsoft based tools are supported via Microsoft's APIs, and you will see an API page when you open such tools. Verify that the API and parameters are correctly listed for these tools.
-
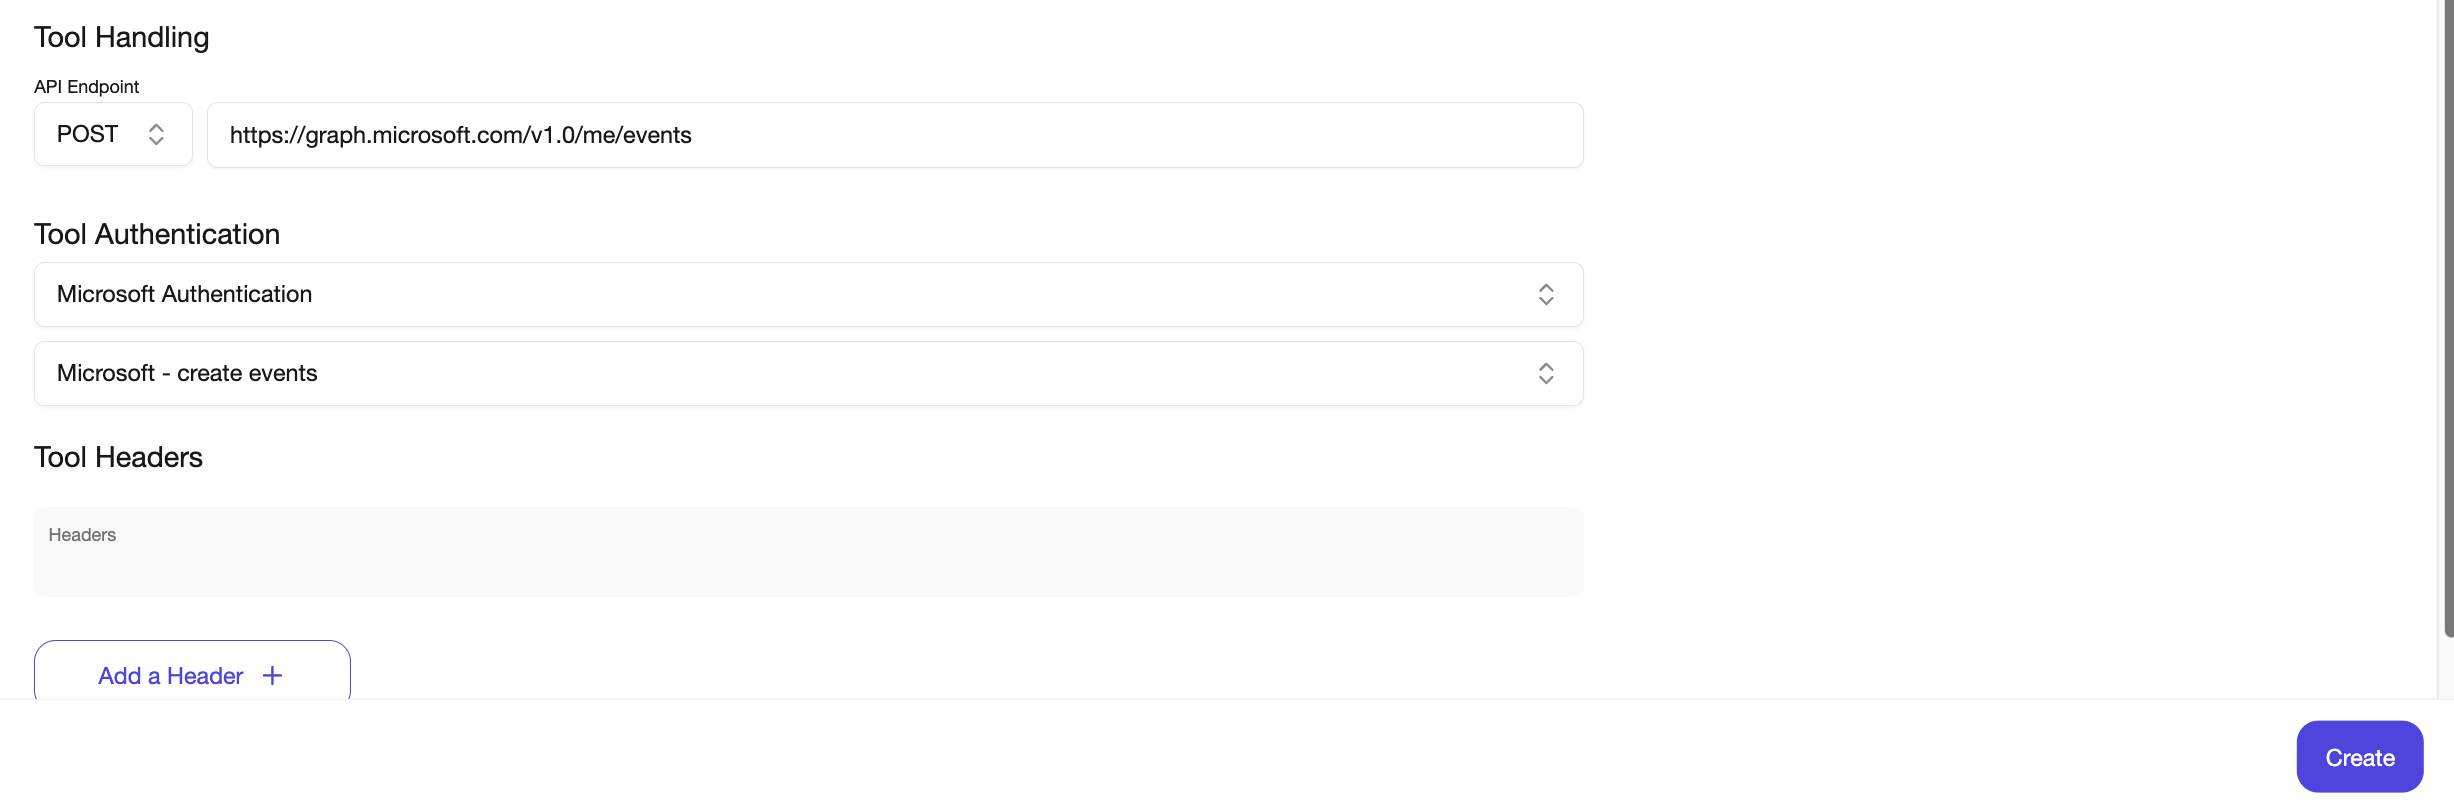
Add the proper Authentication Select Microsoft Authentication from the authentication fields dropdown.
-
Select Microsoft as the Credential Select Microsoft from the Credentials page
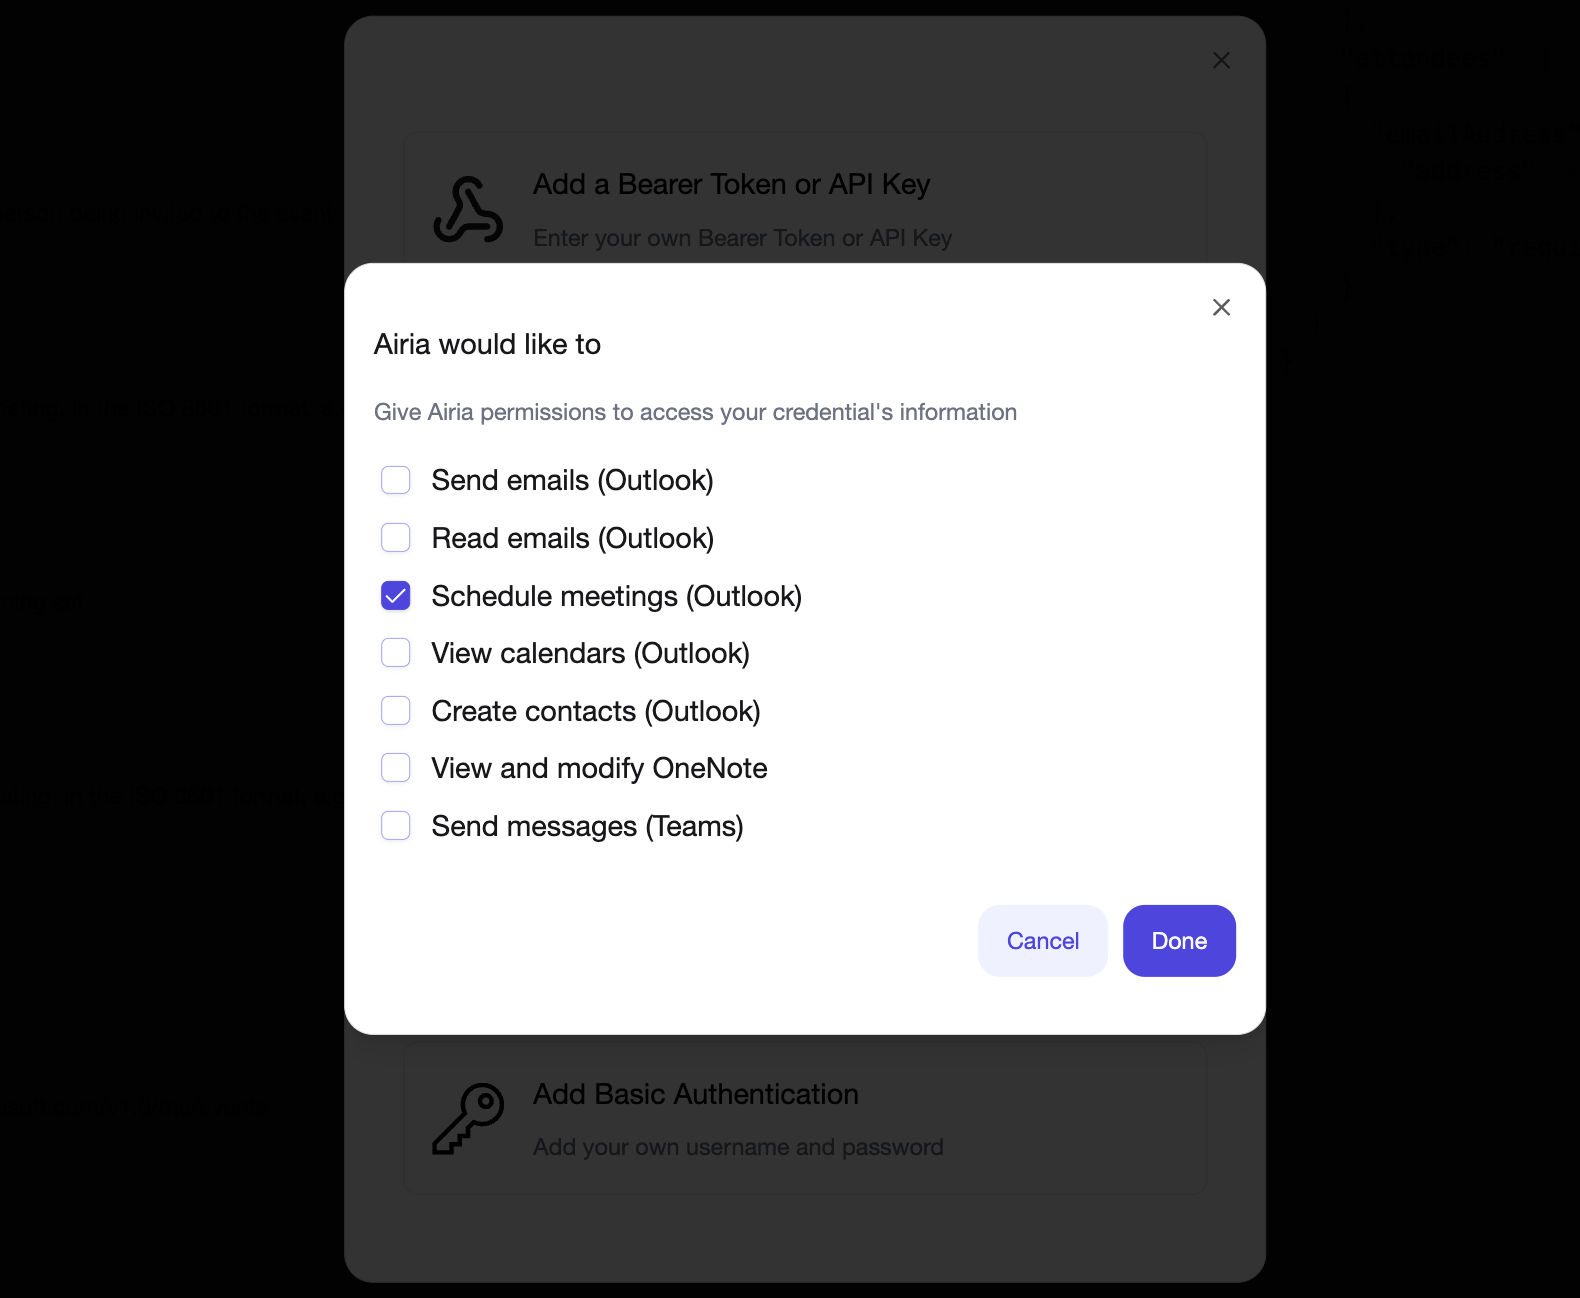
- Provide the correct permissions for Microsoft Based on your use case for the Tool, select the correct permission, and go through the authentication setup. This should generate an Access and Refresh token, which you can save as a new Credentials object. Save and go back to the tool.
-
Verify that the credentials are added Once the credentials have been saved, they should appear under the Tool. Save the tool.
-
Execute the tool in an Agent Add the tool to an agent and execute it to verify that it works properly.
For improved responses, it is recommended that you add a prompt to your model as well, providing details on your email, organization or specific fields or terminology for your organization.